Showing posts with label DIY. Show all posts

Thursday, May 22, 2014

Denim Bleaching DIY {for YOU mag}

{jacket & dress - St. Vinnys (thrifted), jeans - Forever 21}

Hello friends! Our latest issue of YOU mag hit stands yesterday so I thought I'd share the style feature with you today. It's a DIY this time and I put together a tutorial on how to bleach denim and make it fresh and new again for summer, one of my favorite beachy looks for the blazing summer air. It's a really fun experiment really and best achieved on a old something or other, just in case of a mishap. The good news is this, if you make a mistake it's not all over. You can continue on with the dipping and dying to create a really cool ombre effect (my personal fave) or instead, immerse the entire piece of clothing for a complete white out. So here we go!
Supplies:

-  Denim of choice. For this DIY I selected 3 pieces. A denim dress, cut from its original longer length, a denim jacket, and a pair of full length jeans that I cut into shorts.
-  Clorox Bleach
-  Gloves
-  Ruler or skirt hanger
-  Bucket or deep sink
Directions for dip dying:

1. Grab your denim! I suggest starting with a pair of shorts, perhaps even an old pair of “blah” jeans that you can freshen up for summer, cut to your desired length. Just be sure to use a sharp scissors.
2. Pop on a pair of gloves to protect your skin.
3. Mix two parts water to one part bleach to create your bleach solution.
4. If you’re working with a bucket, try threading a ruler through the belt loops of your shorts to suspend them over the bucket while dipping just the ends. If you’re using a sink, try hanging them from the faucet on a skirt hanger (folded over at the waistband to shorten the length if need be).
5. Dip the shorts into the liquid, immersing to the length you desire. You’ll notice that the bleach will run slightly so try to leave an additional inch out of the solution. Soak your denim for approximately 30 minutes or longer, depending on how dark the original color is.
6. Once the bleach has whitened your shorts to the shade you like best, remove them from the solution, wringing them out carefully (grab those gloves) and finally hanging them to dry.
7. Wash and dry your newly bleached denim alone for that first time and then they’ll be safe to include in regular loads for future washes.
Fun Tricks and Helpful Hints: 
If you’re going for an ombre look, simply repeat steps 5 - 7, lowering your denim just a little more into the solution while cutting the bleach time to ensure a less faded color. Repeat again for a third shade of blue, again cutting the bleach time and eventually creating just a slightly lighter blue shade from your original color, one that will fade out effortlessly into a stark and clean white. If you desire an entire white out, as I did with the denim jacket, place the entire piece into the bleach immersing it completely. Here’s the best part, if you’re less than impressed with your attempt at this DIY fashion statement, don’t worry! You can repeat this process a couple of times, creating a color and fade that you’re most happy with. 
And there you have it. Now grab your supplies and give it a try. I'd love to see your results! Just post to instagram and tag me @kirstyg. Have fun!

And thanks to my beautiful sisters for being my models for this article. Mwa!

Wednesday, March 6, 2013

DIY Arrow Onesie

Just a simple little DIY this evening, something I tried over the weekend. A lovely group of girl friends  had a baby shower breakfast together on Saturday and I thought I'd give the 2 preggie ladies a newborn onesie in the much loved arrow motif! I found an example that I loved from Etsy store Eleventy - Five and gave it a try at home.

All I used was a white onesie from Target, Tulip fabric paint from Hobby Lobby, and for the first one, a pencil to get the image started (turned out that free handing worked better for me). The paint dries within 4 hours and is ready to wash in 72 hours. I remember playing with loads of fabric puff paint as a kid and from what I remember, the shirts held up well. So hoping these do too!
Can't wait to see my new little nephew in this very soon. Come on buddy, let's get this show on the road!

Thursday, January 31, 2013

Floral Crown DIY

I thought I'd have a try at making a floral crown for an upcoming photo shoot. I have a plan to do something rather dramatic for these pictures, so this crown was to make a statement. This is the first of 3 that I hope to whip up and while my silk flower options were certainly lacking, I thought it ended up looking really pretty. All supplies were found at Hobby Lobby with the exception of the smaller red flowers which I found at a thrift store.
I used this mesh tiara from the bridal section at Hobby Lobby as my skeleton. To get things going, simply start with the largest and loveliest flower and in this case, wrap the stem around the crown. And then continue on by adding the second largest bloom, keeping them close together and so on. I grabbed the hot glue gun when there were no stems and added smaller blooms working my way down each side. After I'd covered the front half in flowers, I wrapped the remainder of the mesh in a ribbon. And finally, I grabbed the glue gun again and added a few berries to the back of the crown, laying it lightly over the ribbon. 
I think they'll make a beautiful spring decoration when we're not frolicking about with them on our heads. :) Pregnancy permits so many special allowances, does it not?

Friday, January 18, 2013

DIY Picture Wall

It's Friday! I'm exhausted and have been since Wednesday. What gives? Doesn't help that my scalp is itching up a storm, that I wake 3 times each night to pee, and that I feel fat as a cat. Guess that might exhaust a person. 

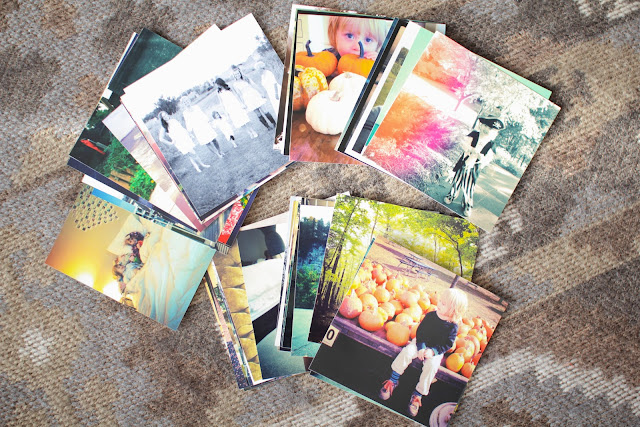
But, despite all of that, I am pleased to share that a very large and empty wall in my living room is now somewhat decorated. I had the room painted a lovely grey back in September, I believe, and I've not to this day done anything to it at all. It used to be a gallery wall (here's a peek at our autumn wall from 2011) but I was ready for something new. So I finally decided to go with this idea ... 4x4 prints of my favorite iphone photos. I think iphone editing is just so incredibly gorgeous, so printing those photos is often more exciting to me than prints from my fancy camera. So I've always printed my Instagram pics through Printstagram and I think they're fabulous (this is how they look above my bed). But I recently found out that Mpix offers prints in square sizes which I love the look of in a collage. Ashley's collage above her fireplace is inspiring. 

So I ordered about 47 4x4 prints (that's just how many images I liked in my phone library - they're 29 cents each for that particular size) and did so directly from my phone via the app Mpix Tap to Print. It was a ridiculously easy way to choose the pictures from my photo library and checkout, right there. No hassle. 

They arrived within 2 days and I set to work immediately. I've never seen Instagram pics this size and despite my reservations, they looked great! I wanted a rectangle to begin with and so decided to use 45 of the prints, 9 across and 5 deep. Here you'll see the almost empty wall, aching for something pretty/cool/whatevs. 
The plan is to expand on this as the photos are taken. They're placed seasonally, beginning with last summer and ending now. Kind of fun right?

Wednesday, December 5, 2012

Decorated for Christmas {+ a DIY}

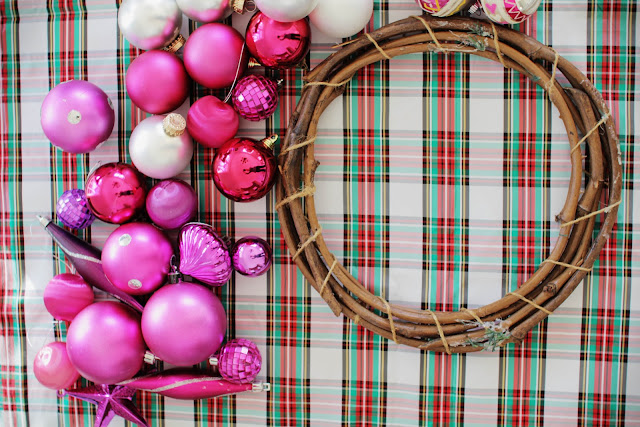
I thought I'd share my recent DIY attempt, a ornament wreath. I'd pinned several of these wreaths recently and thought they were just so gorgeous and surely had to be simple enough to create. I picked up this wreath form from Goodwill, though it had some hideous attachments at the time that I quickly pulled off (just $1 though). And then I had a good collection of pink and white ornament balls from many moons ago (pre-kids) that I thought would be perfect for this project. 
Instructions:
Hot glue the ornaments in a circle, starting with the smaller balls in the inside of the wreath. Continue with a line that lays gently against your inner circle. Finally, add a circle of ornaments to the outside. And you're done! Easy as pie. 
Seeing as it was a bit of a crafty morning with a couple of us girls, I thought I'd share this darling pom pom wreath that our friend Callista made to hang in the window of her kid's bedroom. Isn't that cute? 
And while I was photographing the front door, I thought I'd continue around the house and share how we've decked our halls this year.
Oh Christmas tree. Did you ever fall asleep next to those twinkling lights night after night? In high school, I eventually decided to string twinkle lights around the top of my 4 poster bed cause it was just too divine to enjoy for only one month out of the year. Christmas in America was so different to what we experienced as kids. So exciting! Our Christmas was in the summer in South Africa, celebrated around the pool. We put up a tree just like we do here, except that Father Christmas came instead of Santa and we wore the most ridiculous paper hats during our Christmas lunch. Made for plenty of great pictures though! And we opened crackers with our lunch too (here's a wonderful example of what these are and why we did it at all). But there was less of a build up to Christmas day, I suppose. I remember our first Christmas in Tulsa, attending plays and singing Christmas trees, going to parties that featured carolers which serenaded us while we dined, hand bell ensembles at church and those fantastic Rhema lights! It was all so extravagant and so unreal. Not to mention the department stores ... those were new to us! The fancy decorations that filled the malls ... it felt like a movie come to life. Our experiences now are a little simpler but still absolutely thrilling. Especially when you have your little boy's hand in your own, eyes lit up as he experiences it all with you. I'm not sure if I'll ever feel completely "adult" when it comes to celebrating Christmas. I think I get as carried away with it all as my little ones do. :)
 The chalkboard walls have been put to good use!
PS: You can see how Monty and I made mason jar Christmas trees last year here

Wednesday, November 14, 2012

DIY Glitter Christmas Lights

I've already started a little Christmas crafting as the projects I've planned are really starting to pile up. Plus our decorations will go up next weekend already! My sister and I tackled this one together yesterday and it was incredibly easy with a gorgeous result. Here's how it works ...
Supplies:
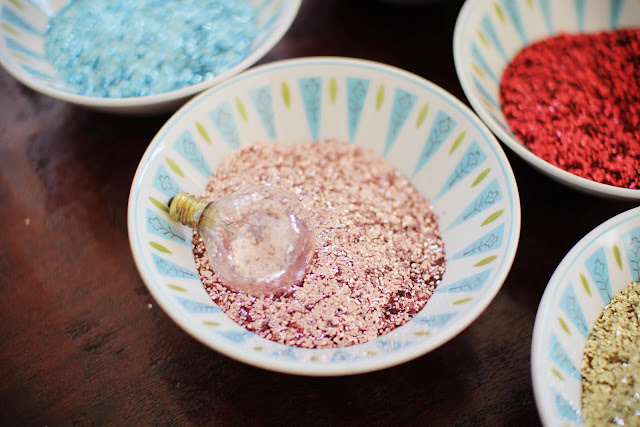
old light bulbs (10 in a bag for a $1 thrifted)
glitter
Elmer's glue
brushes
Coat those bulbs in glue. We tried them fully coated and also with a neat halfway line. Dip the bulbs in the glitter, rolling them around to make sure they're sparkling like crazy. 
 And that's it!
We plan to use them in a Christmas-y centerpiece. Aren't they pretty?

Tuesday, October 2, 2012

DIY Glitter Gourds

Hello friends! I'm finally back and trying to get into the swing of things again. Why is it that a person needs at least 2 days to adjust back to normal life after a little holiday, almost always? It's so difficult! We had a really wonderful time in Austin and the wedding we attended was absolutely beautiful. Seeing much of our extended family again was such a treat for us and all in all, it was a great one. 

Today I'm here with a easy peasy DIY. This is an old one for me, something I did several years ago. I think these green gourds are the coolest things and I love their wacky, chubby shapes and curling stems. I like to do a bit of texturing and embellishing so to speak, so here is a little DIY for adding some fall flavor to your dining table centerpiece.
Really there's no need for explanation but here goes anyway ...
Supplies: 
* gourds themselves, leftover Elmer's kid's glue, fine glitter, paint brush, and rubber spiders for creepy charm. 
* lay paper or in my case, leftover plastic tablecloth, to catch the spill
* brush glue over 1/4 or 1/3 of gourd, distributing evenly
* sprinkle glitter and spread gently with fingers
* shake off excess onto plastic
* add those darling, scary spiders which by the way, tend to stick to anything and everything very well (from Target)

Tuesday, September 18, 2012

DIY Fall Wreath

Hello friends! I pinned this wreath a few weeks back and I had high hopes of attempting a similar version of my own. Things started off well enough but I realized that the whole dream catcher idea was not going to work as well with the supplies I had on hand, though I hope to try it later still. All supplies have come from St. Vinny's thrift store at one time or another. 

What you'll need: 
1. embroidery hoop ($2)
2. crocheted doily    ($2)
3. wool                    (huge back of varied colors for $2)
4. silk flowers          (50 cents per bunch - I bought 4)
5. hot glue gun
How it happens:
1. With some help from my sister and my niece, we tied the edges of the crocheted star to the inner hoop (with wool) and together pulled the outer hoop around it, stretched the doily until it looked right and tightened the screw to keep things in place. 
2. I purchased these silk flowers for 50 cents a bunch. Such a steal and perfect for wreath making. Just pop the flowers off of their stems and place them in a pretty pile. 
3. I started arranging them around a corner of the hoop to get an idea of what might look good but they would not stay in place, so I gave up on that and just winged it. 
4. Then I hot glued the flowers, placing the 3 red roses equally apart and moving in from there. 
And tada! A floral wreath in the deeper, burnt out colors of fall. By the way, here's my spring wreath which is similar, just daintier.

I found inspiration from these flowers, fresh from the farmer's market.


Related Posts Plugin for WordPress, Blogger...